Showing posts with label pattern. Show all posts

Wednesday, January 18, 2012

Mr. Stripey Pajamas

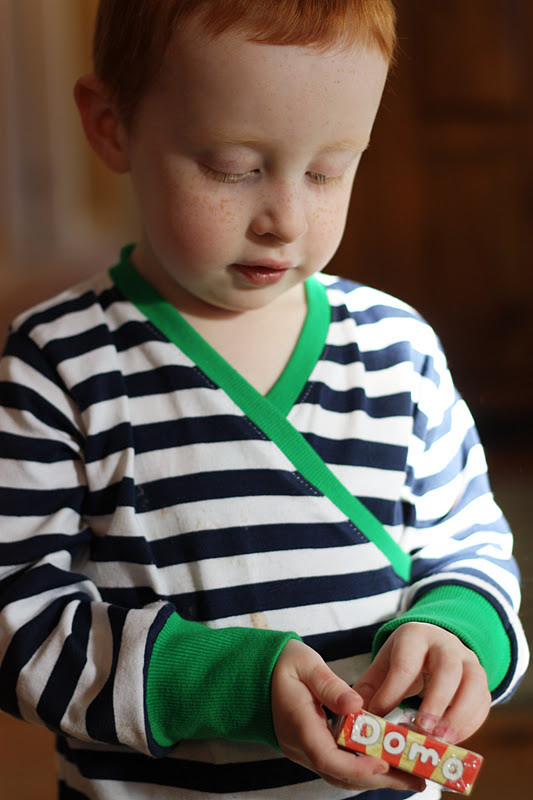
When Travis was a little baby I dressed him in stripes so often he gained the nickname "Mr. Stripey".  
The very last time I sewed anything for him to wear was back in October when I was told by him he didn't want me to make him any "shirts" anymore.  Since then his attitude in general has improved and we noted just the other day, not wanting to jinx the situation, that he's been much more agreeable for the last month or so.  Let's hope it keeps up!

So I made him these striped pajamas.  He likes them so much he doesn't want to take them off!  That's a good sign.


This pattern can be found in Stitch Magazine, which I bought as a back issue. 
 I downloaded the additional add-on of larger sizes (up to 5T) from Fishsticks Designs Blog.  It was a very quick and easy pattern to work with, I highly recommend it!


Snuggling with his brother early in the morning before school.


Tuesday, July 26, 2011

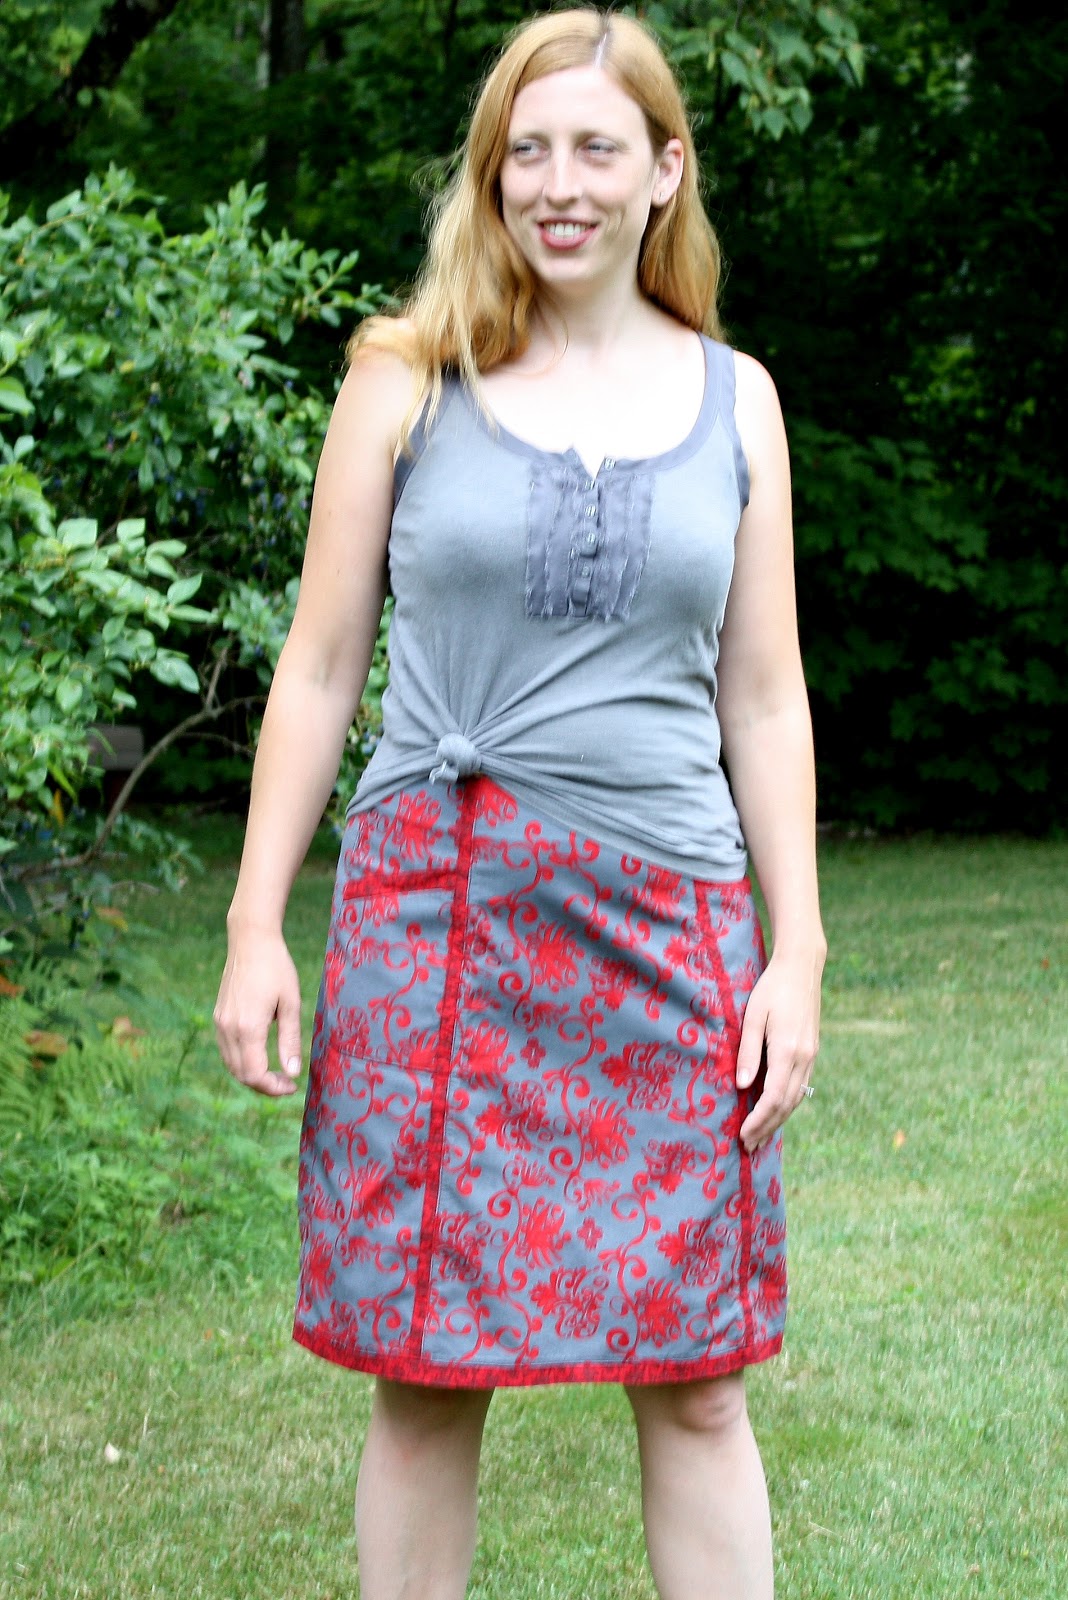
Sew Serendipity Skirt

It's another skirt from the book Sew Serendipity.    


I started to panic about the backlog of projects I had, so I made a list of all the projects I have in mind, and then chose to focus on those that I wanted for summer.  This was the first on my list.

This is the second skirt I've made from the book.  The other one is here.
I love red (it gives me an excuse to wear red lipstick).  This fabric is from Tina Givens which I found on Ebay.  


1 down, 6-7 summer projects to go!
----------------------
1. summer PJ's for Maura
2. summer PJ's for Me (almost done)
3.little military shirt for Travis
5. LBB Pieced Tunic for my friend, Sharon (in progress)
6. 1 or 2 kid's raffle items for the Summer Reading Program, due in August
-------------------
Join the mad dash to finish up your summer sewing.  Link up here:


Friday, July 22, 2011

perfect beach outfit for Travis

I made a few things for Travis last week with my free patterns, and I'm totally in love with this outfit.


The shirt is made in a super light "linen-look" from JoAnn fabrics with seersucker at the placket.  This is great for keeping Travis covered at the beach, his skin is so fair!  The fabric is really thin and cool.
The cargo shorts are made from striped seersucker, a classic for stylish little fellas.


Both patterns were a breeze to whip up, the perfect relaxing summer night project.   

Thursday, May 19, 2011

KCWC - Day 5 - Skivs

Here is what else I made for Kids Clothes Week Challenge...

Skivvys.  Or, as my dad would say, Skivs.
These are mostly made from scraps.  I used the undercover boxer pattern from Fish Sticks Designs and also their FREE tank pattern from the Fishsticks Blog.
I made both versions in the pattern.  First the "regular" boxers with the fly.  He kept putting his hand it and telling me it was a pocket.  Next I decided to make the training pants version which makes more sense for him anyway.  They're nice and soft! 
Pardon the gloomy photos, we haven't seen the sun in New Hampshire in about a week I think!

------------------------------
In other news, I just learned of a new sewing challenge I want to be part of!  This is just what I had in mind.  I have a bunch of skirt and dress projects ready to go!  Check it out!


I also have a dress planned for my daughter's 8th grade graduation and the fabric from Superbuzzy finally arrived today.  I hope it gets done in time!

Thursday, April 14, 2011

Sew Along Dress - finished!

I finished my dress for the Jamie Dress Sew Along a few days back and was finally able to get some pictures, thanks to my favorite 9 year old photographer, Liam. A few days ago it was too dark, and today it was really bright, maybe too bright. But, I'm not complaining!

This fabric was something I had lying around since last summer. It's from JoAnn's, it a "linen look" fabric. I actually like the drape, it's very light. I was a little worried about the large print making me look large, but I really like this funky pattern - good for summer!

The pattern, the Sis Boom Jamie Dress was actually very easy and enjoyable to follow. I have used Scientific Seamstress patterns in the past and I'm always floored at how great the instructions and photos are. I also loved how easy the paper pattern was to assemble on this one.

The only thing I changed from the pattern instructions was adding a ruched waistband to the back to match the front. Sara added instructions on her blog on how to do that. My favorite thing I learned from this pattern is how to use a glue stick to apply a zipper - SO awesome, how did I not know about this before??
I'm very happy with the dress and I'm already in progress with version #2, it's actual linen. Stay tuned for that one!
Than you, Sara, for hosting this sew along! Check out her flickr group of all the dresses.
Also linking up here:
 

make it wear it


Saturday, October 2, 2010

getting ready for the Faire!

**scroll down for the Knignt's Tabbard how-to**

As I mentioned before, we go to King Richard's Faire every fall to celebrate our daughter, Maura's birthday.  Her birthday is actually right before Christmas, but she chooses to celebrate it at the Faire since she loves it so much.  I can't blame her, I love it too!!  It's one of the things I associate most with fall.  Love the smells of the insense and food cooking, the loud games, the glassblowing and blacksmith demonstrations, and most of all the COSTUMES.  Maura's costume was finished last week.

This year I'm going all out for family costumes.  This is the shirt (pattern simplicity 3519) I made for my husband:
Here is a detail of the sleeve, the buttonhole caused me some trouble since my automatic buttonhole wouldn't work for some reason!  So I did it manually, and it turned out OK in the end.


Once that was finished, I started to think about little Travis, how cute he would be dressed up too!  So I decided to make this knight's "Tabard" to fit him out of an old maternity skirt.

To make this I laid the fabric out folded in half, cut a half circle to fit over his head, just as shown in the photo.  Next I pinned double-fold bias tape over all the raw edges.  Just sandwiched the edge between the fold that was already there, and stitched with a zig zag all around.


For the dragon applique, I used a tracer I had on hand from Maura's past obsession with dragons, and traced my dragon onto the wrong side of Heat N Bond Lite.  Then I fused it (very quickly or the fleece will melt) onto the golden-colored fleece.  Then I flipped to the paper side and cut out the dragon.  Next I peeled off the paper, and ironed the applique to the tabard.  I did it on the reversed side of the tabard so I was heating the adhesive from the underside, again fleece can melt a bit.  I only wanted it to bond enough so I could easily sew it down.  So I did that next...

all done!

I hope he likes it.  You never know with 2 year olds!
------------------------------
Now I'm taking advantage of my free time today and going back to my sewing room to make a muffin hat for Liam.  I found this helpful video, it's subtitled in english.  This lady is so cute.

Monday, April 12, 2010

rollie pollie DONE!


This has been a slow moving project over the last month or so. I had meant to make it for Travis' 2nd birthday on April 8th. This pattern is available here, and is one of many totally awesome patterns by Dana on the Made website.


I got the insert done in time, but just finished the cover a few days later. I had trouble deciding which fabric to use but ended up going with this fish fabric, which was really a twin sheet set from Target. After the amount of money I spent on this project (the stuffing alone cost 40 dollars), I was glad to save a little on fabric for the cover. What I really like about this project is that I can make a new cover when we get tired of this one!
Travis loves it! I'm glad I made the larger size since my older 3 children can share it and it's big enough for them.

Monday, March 8, 2010

cute and easy hat!


This is Travis' new hat which I made from this pattern.
It was so easy, I will probably make more! Next I have to show off the cute plaid pants I made to go with this hat.